Our goal is to make your Shopify sales tax reports simple and easy to handle. We also help you manage Shopify taxes so you can stay fully compliant. Here’s the surprising part. In recent years, many Shopify merchants still get audited. These audits cost small businesses about $4,679 on average, just in staff time.
In this SAL Accounting guide, we show you exactly how to create accurate, jurisdiction-level reports. You can avoid these costly problems and turn accurate reporting into a real advantage.
Quick Takeaways
- You can generate a Shopify sales tax report in under 60 seconds by going to Analytics → Reports → Taxes.
- Always use the “United States sales tax report” for detailed state, county, and local tax breakdowns.
- For Canadian sellers, filter the Taxes report by “Canada” to see GST/HST and provincial taxes clearly.
- Shopify calculates tax but does not automatically file or pay it — you must review and file yourself.
- Reconcile your Shopify sales tax report with bank statements and 1099-K every month to avoid penalties.
What Is the Shopify Sales Tax Report and How Does It Work?
A Shopify sales tax report is a built-in tool in your Shopify admin. It shows exactly how much sales tax you collected from customers. It breaks down the numbers by state, country, or local areas. It works by pulling data from every order in your store. You see total sales, the tax you charged, and the tax you collected.
That’s why our Shopify accountant always says, “A good report today saves you thousands tomorrow.” Here is why it matters for your business.
- It saves you time during tax season.
- It gives clean data to your accountant or compliance team.
- It helps you track nexus rules across different states and countries.
- It reduces the risk of expensive penalties and audits.
- It makes your tax filing process much smoother and less stressful.
You need this report for sales tax compliance on Shopify. It helps you prepare your Shopify sales tax return and complete your Shopify sales tax filing without mistakes. Without it, you can miss details and face penalties.
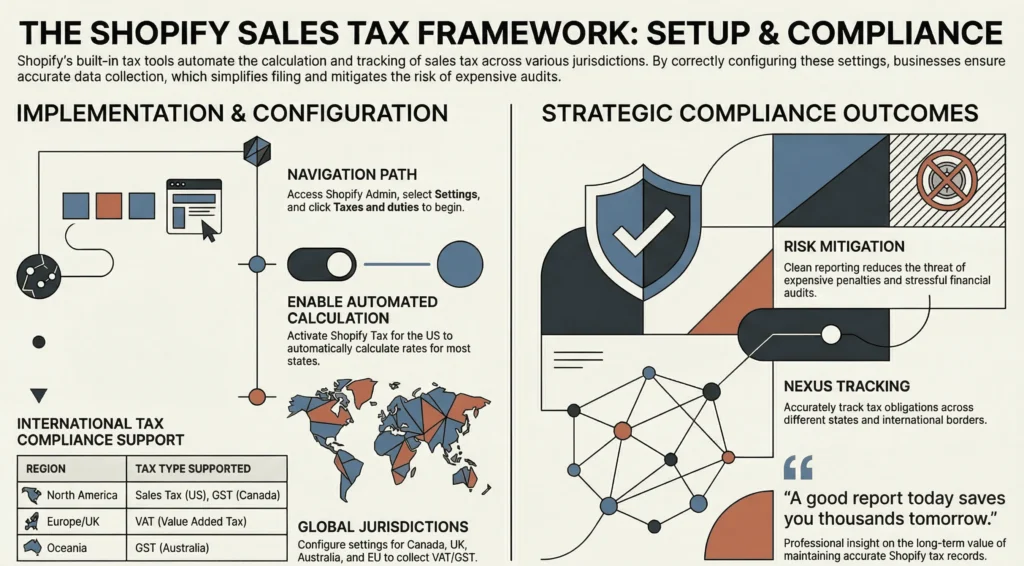
How to Set Up Shopify Tax Management for Accurate Sales Tax Compliance
You build strong tax compliance when you set up Shopify tax management correctly. Follow these simple steps:
- Log in to your Shopify admin dashboard.
- Click on Settings in the bottom left menu.
- Select Taxes and duties.
In this section, you enable Shopify Tax for the United States. This tool automatically calculates sales tax rates for most states. It also makes your Shopify sales tax report more accurate.
Attention: When selling internationally on Shopify, you stay on the same Taxes and duties page. You set up Shopify international tax settings here. Shopify supports tax rules for Canada, the UK, Australia, and many EU countries. You collect VAT and GST where needed.
Pro Tip: Enable Shopify Tax as early as possible. Do this before your sales get too high. This gives you cleaner data and makes your Shopify sales tax filing much easier later.
How to Generate a Shopify Sales Tax Report Step by Step
You can create a Shopify sales tax report in just a few clicks. Follow these steps. Each step explains exactly what to do and why it matters.
1. Log in to Your Shopify Admin Dashboard
Open your browser and log in to your Shopify store. Use an account that can view reports. Whether you are a Shopify dropshipping seller or not, if you are the store owner, you already have full access. This is the main place where you control your store and find all reports.
2. Go to Analytics
In the left menu, click Analytics. This area holds all your store’s performance data and reports. It is the best place to start when you want to find your tax report.
3. Click on Reports
Inside Analytics, click Reports. Shopify shows you a list of many reports. You will find sales reports and tax reports here.
4. Search or Locate the Tax Report
At the top, type “tax” in the search bar. Shopify will show the important reports. Pay attention to these two:
- United States sales tax report: This one breaks down tax by state, county, and local areas. Use it for your Shopify sales tax report by state.
- Taxes Finance Report: This one shows taxes collected by province or territory, including GST, HST, PST, or QST. Use it for Shopify HST/GST taxes when you prepare your tax returns.
Pick the report that matches what you need. Here is a quick comparison table:
| Report Type | Best For | Breaks Down By | When to Use It |
| United States sales tax report | U.S. sales | State, county, and local areas | When you need a detailed Shopify sales tax report by state |
| Taxes Finance Report (or Canada taxes) | Canada and international sales | Province/territory or country | When preparing Canadian GST/HST or provincial returns |
5. Choose Your Date Range
After the report opens, pick the time period you want. You can choose:
- This month
- Last quarter
- This year
- Custom dates
Select dates that match your tax filing period. The correct dates make sure your report includes every sale. Wrong dates can leave out sales and cause problems in your Shopify sales tax return. Consider best practices for Shopify accounting and stay mistake-free.
6. Apply Filters (Optional but Recommended)
You can use filters to focus the data. This step helps you get exactly what you need. You can filter by:
- Specific states or countries
- Sales channels (online store, POS, etc.)
- Customer locations
Filters are very useful when you want tax data for one state or for international orders.
7. Export the Report
When everything looks right, click the Export button. Shopify saves the report as a CSV file. Give the file a clear name like “Shopify-Tax-Report-January-2026.csv”. You can open this file in Excel or Google Sheets.
Pro Tip: Create and export this report every month. Keep all files in one folder on your computer. This habit makes your Shopify sales tax filing much easier later.
How to Use Shopify Sales Tax Report for Canadian GST/HST and Provincial Returns
If you sell in Canada, you need to handle Canadian taxes like GST/HST and provincial taxes like PST and QST. Shopify’s report can help you, but you must use it the right way. Here is how to do it:
- Log in to your Shopify admin.
- Go to Analytics > Reports.
- Type “tax” in the search bar and open the Taxes report.
- Filter the report by Country = Canada.
- Choose your tax period (monthly, quarterly, or yearly).
- Export the report as a CSV file.
This report shows your total sales to Canadian customers, GST/HST collected, and PST or QST collected by province. You can use these numbers to prepare your GST/HST return with the CRA and any provincial tax returns.
Pro Tip: Export the report with the Canada filter turned on and save each file in a folder called “Canada Tax Reports – 2026”. Keeping them organized makes your tax filing much faster and less stressful.
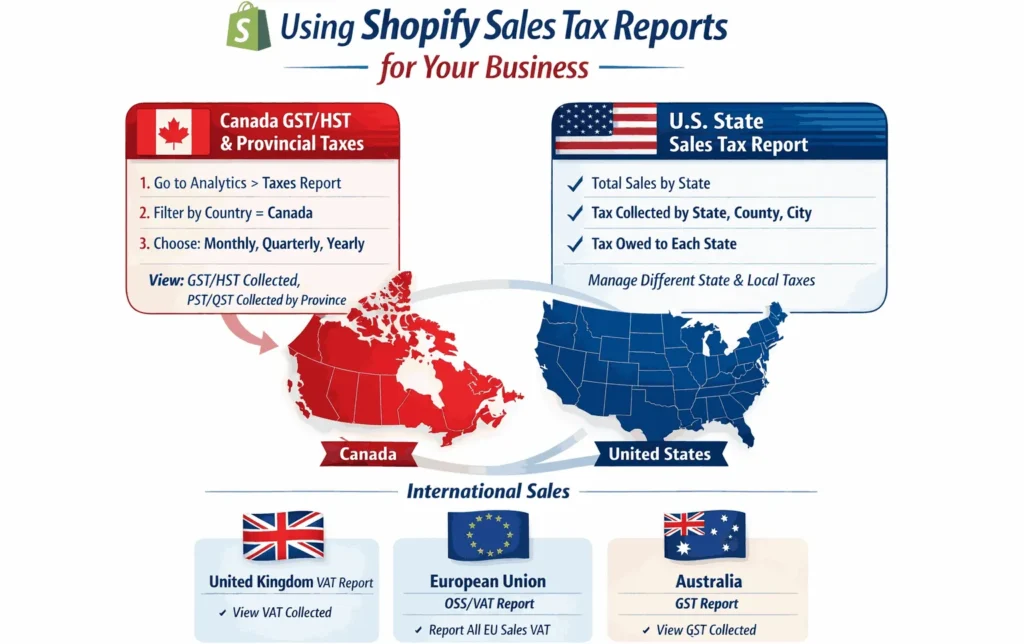
How to Get Shopify Sales Tax Report by State: U.S. Regional Requirements
Many Shopify sellers ship to customers in different states. This makes sales tax more complicated. The Shopify report by state helps you manage different types of e-commerce taxes.
This report shows your tax data broken down by state, county, and local areas. You can clearly see how much tax you collected in each location. This information is very useful when you prepare your tax returns and do your filing.
Why You Need a Shopify Sales Tax Report by State
Every state has its own sales tax rules. Many states also add county and city taxes on top of the base rate. When you sell enough in a state, you create a “nexus.” Sales tax nexus means you are required to collect and remit sales tax there. The report by state helps you see:
- Total sales made in each state
- Tax you collected from customers
- Tax you still need to pay to the state
This clear breakdown helps you stay compliant and avoid penalties.
Sample U.S. State Sales Tax Overview (2026)
Here is a simple table with key details for some of the largest states. Use your sales tax report by state to compare these numbers with your actual sales.
| State | Base State Sales Tax Rate | Economic Nexus Threshold | Notes |
| California | 7.25% | $500,000 in sales | High local taxes in many counties |
| New York | 4.00% | $500,000 in sales + 100 transactions | Local taxes vary widely |
| Texas | 6.25% | $500,000 in sales | No transaction threshold |
| Florida | 6.00% | $100,000 in sales or 200 transactions | Common for many sellers |
| Illinois | 6.25% | $100,000 in sales (no transaction count as of 2026) | Threshold is sales only now |
Pro Tip: Check the exact thresholds for the states where you sell the most. Doing this regularly keeps your tax setup accurate.
Case Study: Toronto Jewelry Maker Avoids $4,800 Penalty1
Sarah runs a handmade jewelry store from her studio in downtown Toronto. She sells mainly to customers in Canada and the United States.
Problem
She checks only her total sales numbers and misses the county-level details in her reports. When her California sales cross $520,000, she discovers she has under-collected local taxes in Los Angeles and San Francisco counties by nearly $4,800.
What We Do
We guide her to open the detailed United States sales tax report by state. She fixes her product tax settings, exports fresh reports, and files the corrected returns just in time.
The Result
Sarah avoids heavy penalties and catches the mistake early. She now generates and reviews her Shopify sales tax report by state every month from her Toronto studio.
Can You Get a Shopify Sales Tax Report for International Sales (VAT, GST, etc.)?
Yes. If you sell to different countries, you face different tax rules. Cross-border e-commerce shipping requires more attention. Here is a simple breakdown to help you use your Shopify sales tax report correctly.
United Kingdom (UK)
Use the Taxes report and filter for the United Kingdom. It shows VAT (value-added tax) collected. Most UK sellers must register for VAT once they cross the £90,000 threshold and file through the official VAT portal.
European Union (EU)
Use the Taxes report filtered by each EU country or view total EU sales. Many sellers use the One Stop Shop (OSS) system to report all EU VAT in one single return.
Australia
Filter your Taxes report for Australia. It shows the GST collected. You must register for GST if your Australian sales go over AUD $75,000 in a year.
Pro Tip: Always export your Shopify sales tax report with the country filter turned on. Save each country’s file in a separate folder. This small habit makes preparing your international tax returns much faster and less confusing.
Case Study: Mississauga Fitness Equipment Seller Masters EU VAT2
Michael owns a fitness equipment store located in Mississauga, Ontario. His business grows quickly with customers across Europe.
Problem
He does not track VAT properly, even though his EU sales keep increasing. He risks late filing penalties that could cost him over €3,200.
What We Do
We show him how to use the Shopify Taxes report filtered by country. He calculates the exact VAT owed each quarter and registers for the One Stop Shop (OSS) system on time.
The Result
Michael files his first EU VAT return without any issues and avoids the penalties completely. He now exports a separate report for each country and keeps everything organized from his Mississauga warehouse.
Preparing Your Shopify Sales Tax Return and Filing Process
Now you have your Shopify sales tax report ready. The next part is turning that report into an actual tax return and getting it filed. You basically have two options: do it manually or use automated filing where it’s available.
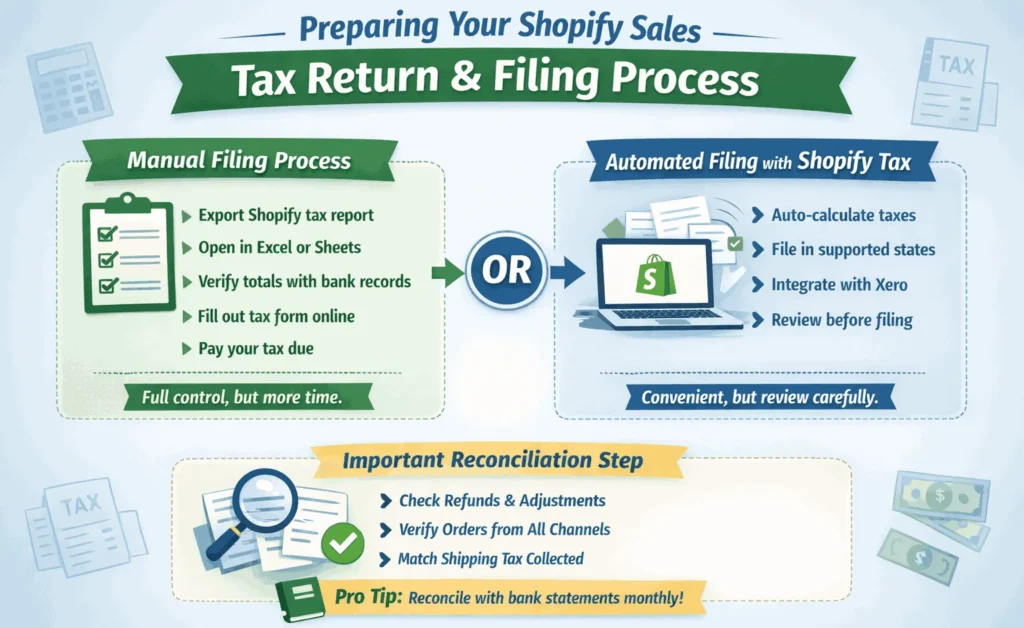
Manual Filing Process
Most small and medium Shopify stores still do it manually. Here’s how it usually goes:
- Export your Shopify sales tax report for that tax period.
- Open the CSV file in Excel or Google Sheets.
- Check the total tax you collected.
- Compare the numbers with your bank deposits and other records.
- Fill out the tax return form on the official government website.
- Pay the tax you owe before the deadline.
This way gives you full control, but it does take more time. Check the Shopify accounting & bookkeeping guide for an easier process.
Automated Filing with Shopify Tax
If you turned on Shopify Tax in the states that support it, Shopify can take care of some of the work. It calculates the tax automatically. In a few states, you can even file and pay it for yourself. Shopify integration with tools like Xero is also helpful.
Attention: Shopify does not automatically report or pay your sales tax to every state. You still have to review the numbers yourself and make sure everything looks right.
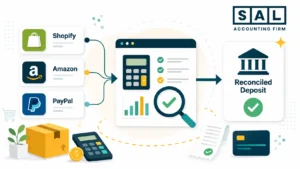
Important Reconciliation Step
Before you send in any returns, always double-check your report against your other records. Shopify payment reconciliation is a must. Pay close attention to:
- Refunds and adjustments
- Orders from different sales channels
- Shipping tax you collected
Pro Tip: Reconcile your Shopify sales tax report with your bank statements every month. This small habit prevents surprises and makes filing much easier. Book a consultation with our bookkeeping team for better results.
Can Shopify Automate Sales Tax Reporting and Filing by state and country?
You can make sales tax compliance much easier using the best Shopify integrations and tools. Just pick the right tools and follow good habits. Shopify has its own tools, but you can also connect third-party apps. We will have a look at them as follows:
Shopify’s Own Tax Tools
Shopify Tax automatically calculates sales tax for you in many cases. It also gives you better reports. For international sales, Shopify helps with VAT and GST in supported countries.
However, Shopify does not handle everything automatically. You still need to review the reports and file returns in most cases.
Third-Party Tax Automation Tools
Many Shopify sellers use extra apps to make things smoother. Here are some popular options:
- Avalara: A powerful tool that automates tax calculation, filing, and nexus tracking across many countries. Avalara is one of the best accounting apps for Shopify.
- TaxJar: An easy-to-use app that focuses on US sales tax. TaxJar automatically calculates tax and files returns for you in most states.
- Quaderno: A great choice for international sellers. Quaderno specializes in VAT and GST compliance for Europe and other regions.
- Taxify: A simple and affordable tool that helps with both US sales tax and international VAT calculations.
These tools connect directly with Shopify. They can calculate tax more accurately, file returns automatically in many states and countries, keep track of nexus for you, and generate ready-to-file reports.
| Feature | Shopify Tax | Third-Party Tools (Avalara, TaxJar, etc.) |
| Automatic tax calculation | Good for most U.S. states | Very accurate, including local taxes |
| Automatic filing | Limited states | Many states and countries |
| Nexus tracking | Basic | Advanced |
| International support | Good | Excellent (VAT, GST, etc.) |
| Cost | Included in Shopify plan | Extra monthly fee |
Pro Tip: Connect your Shopify store with accounting software like QuickBooks or Xero. This lets you export your tax data with one click and makes your Shopify sales tax return much easier.
If you need reliable e-commerce accounting services, get in touch for a consultation today.
- Read on: “Shopify Integration with QuickBooks: How to Sync, Automate & Reconcile Your Store’s Accounting”
Final Thoughts
Shopify sales tax reporting becomes much easier once you understand the process and build good habits. Whether you sell only in Canada, across the US, or internationally, staying on top of your reports helps you avoid penalties and save time. The key is consistency. Generate your reports regularly. Reconcile them every month. Keep everything organized.
Still have questions about your Shopify taxes? Feel free to reach out to our team at tax@salaccounting.ca. We’re happy to help you simplify your tax reporting.