
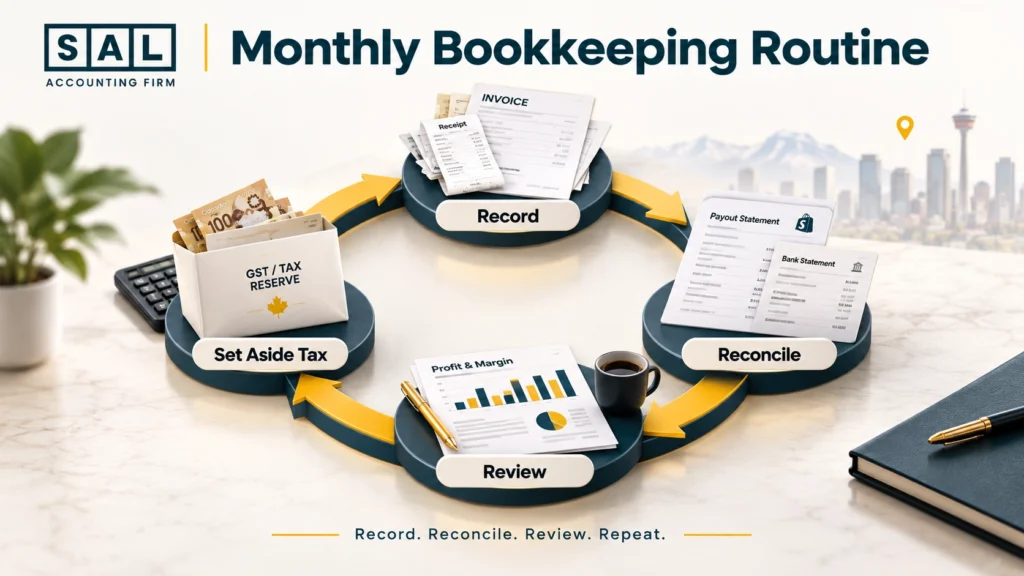
Does your Calgary store’s dashboard say one number while your bank says another? That gap is normal, and a simple monthly routine closes it: record every sale and cost, reconcile your payouts to the bank, then review the month before you close it.
The steps below, put together by SAL Accounting, walk you through that routine from setup to tax time:
Quick Takeaways
- Online store bookkeeping comes down to three habits: record, reconcile, review.
- Keep business and personal money completely separate from day one.
- Record gross sales, fees, refunds, and tax separately, not just what reaches your bank.
- Track inventory and COGS so your profit reflects what you actually sold.
- Keep GST collected out of your revenue, and claim the GST you pay.
- Keep your records for six years, even if a bookkeeper handles them.
What Does Bookkeeping Actually Look Like for a Calgary Ecommerce Store?
It looks different from a regular shop’s books, because your money passes through a platform before it reaches you. Say a customer places a $100 order. After $9 of platform and payment fees, $91 lands in your bank. Good books record all three pieces:
- $100 in sales
- $9 in fees
- $91 deposited
If you only record the $91, your sales look smaller and your fees disappear. That makes it hard to see what’s working. Here’s how an online store’s books differ from a regular shop’s:
- Payouts: money arrives in batches, days after the sale
- Fees: platforms and payment processors take their cut before you’re paid
- Refunds: they come out of later payouts, not as separate transactions
- Inventory: what you buy isn’t an expense until it sells
Once you understand that flow, the steps below make a lot more sense.
Step 1: Separate Your Business and Personal Money
Open a business bank account and get a business credit card. Use them for business only.
Mixing personal and business spending is the fastest way to make your books messy. Every personal coffee on the business card has to be found, flagged, and taken out later. Record your startup costs from day one, even small ones:
- Your store platform plan and apps
- Your first inventory order
- Packaging and shipping supplies
- Registration and licence fees
On that last point, check whether your store needs a City of Calgary business licence. The City’s retail business licence page covers online and phone sales, and businesses run from a Calgary location may need location approval even when no licence is required. If you pay for a licence, record it as a startup cost.
Step 2: Pick Your Accounting Software and Connect Your Store
Spreadsheets work for a few weeks. After that, accounting software saves you hours every month. Look for software that offers:
- A direct connection to your store and payment processor
- Tax codes for multiple provinces, since your customers won’t all be in Calgary
- A clearing account for payouts, so you can match each payout to its sales and fees
Most Calgary online stores use QuickBooks Online or Xero. The best fit depends on how many channels you sell through and how much inventory you carry. Comparing the best ecommerce accounting software side by side makes the choice easier.

Step 3: Set Up a Chart of Accounts That Fits Ecommerce
Your chart of accounts is the list of categories every dollar gets sorted into. The default list in most software is built for general businesses, so it needs a few changes for an online store. The table below shows a simplified setup.
| Account Type | Example Accounts | Why It Matters |
|---|---|---|
| Revenue | Sales by channel (website, Amazon, wholesale) | Shows which channel brings in money |
| Contra revenue | Discounts, refunds | Keeps sales numbers honest |
| Cost of goods sold | Product cost, freight in, packaging | Shows your real product margin |
| Selling costs | Platform fees, payment fees, shipping out | Reveals the cost of each sale |
| Marketing | Ads, influencer costs | Tracks what you spend to win customers |
| Liabilities | GST/HST collected | Keeps tax out of your revenue |
| Clearing | Payout clearing account | Matches payouts to sales and fees |
Once the accounts are set, each transaction needs to land in the right place. Knowing how to categorize ecommerce transactions consistently keeps your reports useful month after month.
Step 4: Record Gross Sales, Not Just What Hits Your Bank
This is the most common mistake in online store bookkeeping. Recording payouts as revenue hides your fees, refunds, and tax inside one number.
Instead, record each payout as its parts:
- Gross sales
- Discounts
- Refunds
- Platform and payment fees
- GST/HST collected
- The net payout
Most accounting software can do this automatically once your store is connected. Timing matters too. Recording sales when they happen, not when cash arrives, is the core of the cash vs accrual accounting choice, and it gives a much clearer picture of each month.
Case Study: How a Calgary Candle Brand Finds Out Its Revenue Was Wrong
Olivia runs an online candle brand from a small studio in Inglewood, Calgary. She sells through her own store and records each payout as revenue when it reaches her bank. Her store plan and apps are billed to her personal credit card, so they never make it into the books.
The problem: Olivia’s payouts include GST she collected from customers, and her books treat that GST as income. Over a year, that adds several thousand dollars of revenue that was never hers. Meanwhile, her store plan and app charges, which are real business expenses, never show up at all. Her income looks higher than it is, and her deductions look lower.
What she does: Olivia rebuilds the year with each payout split into sales, fees, refunds, and GST. She moves the GST into a liability account and adds the plan and app charges from her card statements as business expenses.
The result: Her taxable income drops once the GST is taken out and the missing expenses are added. She moves the store plan to her business card and now records every payout in parts.
Step 5: Track Inventory and Cost of Goods Sold
Inventory isn’t an expense when you buy it. It becomes cost of goods sold (COGS) when it sells.
Start by knowing your landed cost, which is what each unit really costs you:
- Product cost
- Freight to get it to you
- Duties, if you import
Then decide how you’ll track stock:
- Count it regularly, at least at month-end or quarter-end
- Record COGS as products sell, based on what each unit cost you
Here’s a simple example. You buy 500 candles at $8 landed cost each, for $4,000. You sell 300 this month. Your COGS for the month is $2,400, and the other $1,600 stays on your books as inventory.
The formula behind this is straightforward once you’ve seen it, and it helps to know how to calculate COGS for an ecommerce store before your stock grows.
Step 6: Track GST on Every Sale and Expense
Calgary customers pay 5% GST, since Alberta has no provincial sales tax. But customers in other provinces pay different rates, so your store needs to charge tax based on where each order is delivered.
In your books, track two things:
- GST/HST collected: what you charged customers, held for CRA
- GST/HST paid: what you paid on business costs, which you can claim back as input tax credits
Once your taxable sales pass $30,000, you generally need to register and start charging GST.
Before you file, estimate what you can claim back with the GST/HST Refund Calculator. Province-by-province rates and the rules for selling across Canada are laid out in this look at GST for online stores in Edmonton, which applies just as well to Calgary sellers.
Pro Tip: Keep every supplier invoice that shows GST. CRA can ask to see it before allowing an input tax credit.
Step 7: Reconcile Payouts and Bank Accounts Every Month
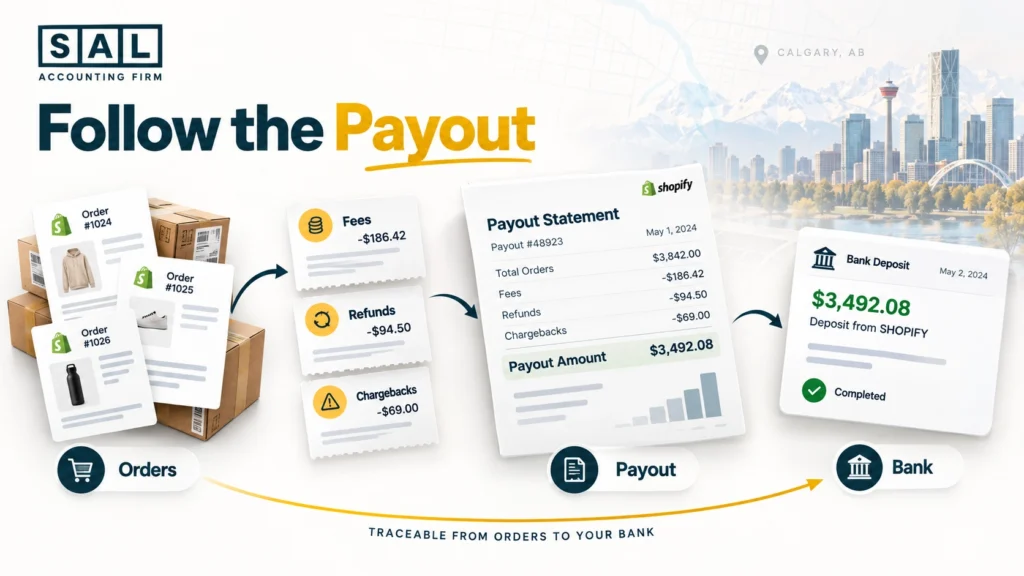
Reconciling means checking that every payout and bank transaction matches what your books say. For each payout, match:
- The orders it covers
- Fees taken out
- Refunds deducted
- Chargebacks
- The final amount that reached your bank
Then reconcile your bank and credit card accounts against their statements. If something doesn’t match, find the reason. Don’t just plug the difference.
A step-by-step walkthrough of Shopify payment reconciliation shows how this works on the most common platform.
Case Study: How a Calgary Apparel Brand Tracks Down a Monthly Payout Gap1
Noah runs an online apparel brand from a shared studio in the Beltline, Calgary. Every month, his store shows more sales than the money that reaches his bank. He assumes it’s just fees and moves on.
The problem: In one month, Noah’s store shows $42,000 in sales, but only $38,500 arrives in his bank. Fees explain about $1,400 of the gap. The other $2,100 is a mystery, and it’s been happening every month.
What he does: Noah matches each payout to its orders, line by line. He finds $1,600 of refunds that came out of later payouts and $500 of chargebacks, including their fees. Neither was ever recorded in his books.
The result: Noah’s revenue and expenses now reflect what actually happened. He sees that his return rate is higher than he thought, which leads him to tighten his sizing guide. He now reconciles every payout at month-end.
Step 8: Close the Month and Read Your Numbers
Closing the month means wrapping up your books so the numbers are final and ready to read. The table below shows a simple routine.
| Task | Weekly | Monthly |
|---|---|---|
| Record new transactions | Yes | Final check |
| Save receipts and invoices | Yes | Confirm nothing’s missing |
| Reconcile payouts and bank | Optional | Yes |
| Count or update inventory | No | Yes |
| Review profit and loss | No | Yes |
| Check gross margin | No | Yes |
| Set aside GST and income tax | No | Yes |
Once the month is closed, read your numbers. Ask three questions:
- Did I make money this month?
- Is my gross margin holding steady?
- Have I set aside enough for GST and income tax?
A detailed month-end close checklist covers every step if you want more depth.
Pro Tip: Block one fixed day each month, such as the 10th, for closing your books. A set date turns it into a habit.
Step 9: Keep Records the Way CRA Expects
CRA expects you to keep your business records for six years from the end of the last tax year they relate to. You’re responsible for keeping adequate records even if a bookkeeper or accountant keeps them for you.
That includes:
- Sales and payout reports
- Bank and credit card statements
- Receipts and supplier invoices
- GST/HST records
- Inventory counts
Digital records are fine, as long as they’re readable and backed up. A cloud folder sorted by year and month works well for most Calgary online stores.
What Changes If Your Calgary Ecommerce Store Is Incorporated?
If your store is a corporation, your bookkeeping routine stays mostly the same, but your year-end filing changes.
A corporation files a federal T2 return with CRA. Alberta also runs its own corporate income tax, so a corporation with a permanent establishment in Alberta generally files a separate Alberta corporate income tax return (AT1), unless it’s exempt.
For bookkeeping, the main changes are:
- Keeping company money fully separate from the owner’s
- Tracking owner pay, whether salary or dividends
- Closing the books in line with the corporation’s year-end
The federal side of a corporate return is explained in this overview of the CRA T2 corporate tax form.
Final Thought: Record, Reconcile, and Review Your Calgary Store’s Books Every Month
Bookkeeping for a Calgary online store doesn’t have to be a scramble. Separate your money, record every payout in parts, track inventory and GST, reconcile each month, and keep your records. Done monthly, tax time becomes a quick review instead of a rush.
Seeing how ecommerce bookkeeping is set up can show you what a full monthly routine looks like in practice.
Clean books are the first step toward stronger numbers. Map out what comes next with our financial roadmap for growing online stores.
- Hypothetical Scenario ↩︎