We make Shopify integration with QuickBooks Online simple so sales, taxes, fees, and payouts sync and reconcile without extra work. More importantly, we prevent payout mismatches and bad tax mapping from cutting into profits. Tiny errors scale fast. Shopify stores moved $292.27 in 2024 and $74.75 in Q1-2025. Even a 0.5% mispost can skew margins and filings.
In this guide from SAL Accounting, we’ll show the fix in detail, pick the right sync (Intuit connector or A2X), map US sales tax and Canada GST/HST, and reconcile every payout step by step.
Quick Takeaways
- Integrate Shopify with QuickBooks using A2X or Intuit Connector for automatic sales and tax sync in minutes.
- A2X excels for fast payout reconciliation; use Intuit for detailed order tracking.
- Map sales, fees, refunds, and GST/HST to QuickBooks accounts to keep taxes compliant for US/Canada sellers.
- Reconcile payouts weekly by matching net deposits to bank entries, avoiding mismatches.
- Fix sync issues like fee errors by remapping accounts and testing short date ranges first.
What Is Shopify–QuickBooks Integration?
Shopify–QuickBooks integration is a secure connection using apps like Shopify Connector by Intuit or A2X. It moves your Shopify sales, refunds, fees, and taxes into QuickBooks Online automatically. You can choose how much detail to sync (per order or by payout) and when it updates. It’s not a tax tool, but it keeps your books accurate. Get help from our e-commerce accountant for Shopify–QuickBooks integration.
What Shopify Accounting With QuickBooks Does For Your Store
Your books should keep pace with your store without copy and paste. Connect Shopify to QuickBooks Online and your sales, refunds, discounts, shipping, gift cards, tips, fees, and taxes post to the right accounts automatically. Generally, top shopify integrations for e-commerce stores help you a lot. Here is what it does for you:
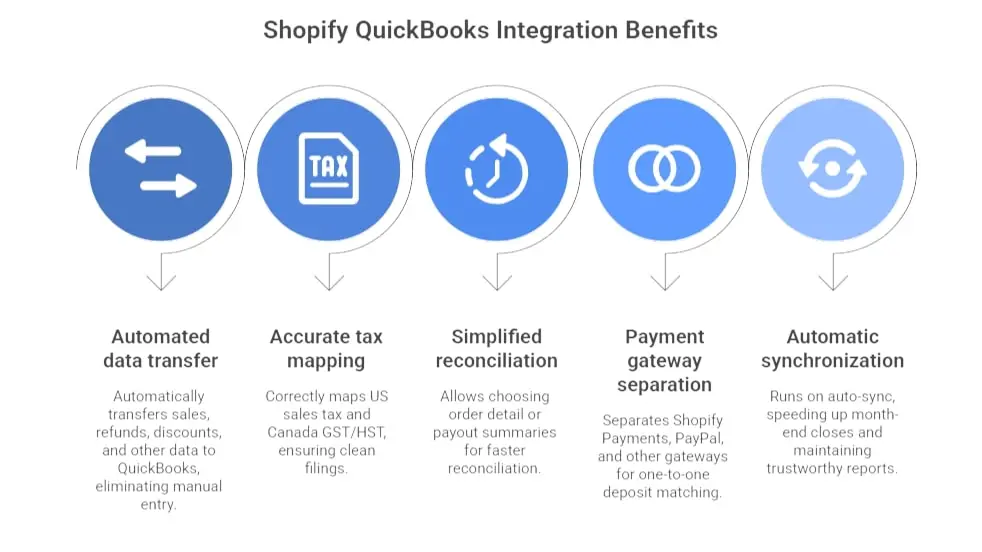
- Moves sales, refunds, discounts, shipping, fees, taxes, and gift cards into the right QuickBooks accounts so you stop manual entry.
- Keeps US sales tax and Canada GST or HST mapped correctly so filings stay clean.
- Lets you pick order detail or payout summaries so reconciliation takes minutes, not hours. hours
- Separates Shopify Payments, PayPal, and other gateways so each deposit matches one to one
- Runs on auto sync so month-end closes faster and reports stay trustworthy
Pro Tip: Choose summary-by-payout (A2X) for quicker reconciliation. This group’s data into one clean entry per payout, saving time at month-end. Have a look at the best accounting software for Shopify sellers, too.
Example: Friday payout shows gross 5,200, discounts 180, refunds 120, shipping 240, taxes 430, fees 155, net 5,415 to your bank. One tidy entry hits your mapped accounts. You open Reconcile in QuickBooks, click Match, and Shopify’s Clearing goes to zero. Clean and done.
Shopify QuickBooks Integration Tools: Which One Works Best for You
Before setting everything up, you need to choose the right tool for your store. It really depends on how much detail you want in your QuickBooks and how fast you need to reconcile your accounts. Here’s how to decide which one is best for you.
Shopify Connector by Intuit (Best for Order-Level Detail)
If you want every single order’s details inside QuickBooks, go with Shopify Connector by Intuit. It pulls in everything (sales, refunds, discounts, shipping, taxes, and fees) and posts them as separate transactions. Learn more about Shopify taxes for US and Canadian sellers to stay compliant.
Why choose this:
- You need per-order details in QuickBooks, like tracking each purchase, refund, and discount separately.
- You want to see every line item in your QuickBooks reports.
- Your store is small or just starting out, and you don’t mind a bit of extra noise in your books.
What to expect:
This method creates individual entries for each order in QuickBooks. It’s great if you need a lot of detail, but it can make monthly reconciliation a bit more work. If you’re looking for order-level details, this is your best bet. You may need to know about the month-end close process and checklist for Shopify.
A2X (Best for Fast, Clean Reconciliation)
If you want fast reconciliation and clean, simple books, go with A2X (here). It posts one entry per payout, summarizing everything like sales, fees, refunds, and taxes. This makes it easy to match your deposits to QuickBooks.
Why choose this:
- You want summary-based entries instead of detailed line-by-line data.
- Your store is growing, and you want fast month-end reconciliation.
- You don’t need every order’s detail, just the totals.
What to expect:
A2X groups your sales, fees, refunds, taxes, and shipping into one clean entry per payout. You’ll get quick reconciliation, but you won’t see individual transactions in QuickBooks. If you want speed and clean books, A2X is the way to go.
Pro Tip: Choose summary-by-payout (A2X) for quicker reconciliation. This group’s data into one clean entry per payout, saving time at month-end.
- Read More: “A2X for Shopify Integration: How to Set It Up”
When to Use Other Tools: Webgility, MyWorks, Link My Books
Intuit Connector and A2X are the most common options, but there are other tools out there that might work better for your needs.
- Webgility: Choose Webgility if you need better integration with QuickBooks Desktop or have a more complex payout workflow.
- MyWorks: MyWorks is great if you want more control over how orders are posted in QuickBooks (like deciding whether to use invoices or sales receipts).
- Link My Books: Link My Books is a good option if you want automatic summary entries with built-in tax breakdowns and an easy reconciliation process.
See how the top Shopify–QuickBooks tools compare and find which one fits your store best:
| Tool | Best For | Key Benefit | When to Use |
| Shopify Connector by Intuit | Order-level tracking | Imports every order, refund, and tax into QuickBooks | Small stores needing detailed reports |
| A2X | Fast, clean reconciliation | One summary per payout; auto-matches deposits | Growing stores focused on speed |
| Webgility | Complex workflows | Strong QuickBooks Desktop + multi-channel support | Larger or multi-platform sellers |
| MyWorks | Custom setup | Lets you choose invoice or receipt posting | Stores wanting manual control |
| Link My Books | Easy automation | Auto summaries with tax breakdowns | UK/EU sellers needing VAT/GST clarity |
Step-by-Step Setup: Shopify Integration with QuickBooks
Once you pick your method, set up the connection between Shopify and QuickBooks Online. Follow these steps to sync your accounting and keep it running smoothly.
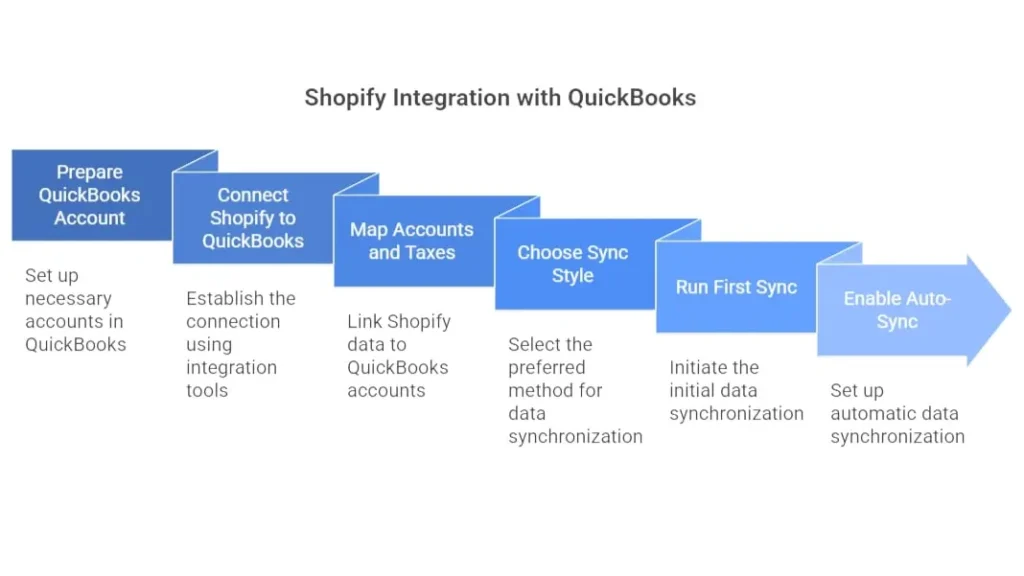
1. Prepare Your QuickBooks Online Account
Set up QuickBooks before connecting to Shopify. Create accounts for Sales, Shipping, Discounts, Fees, Gift Cards, Taxes, and Shopify Payments Clearing. For taxes, enable Automated Sales Tax (AST) in the US or configure GST/HST in Canada.
2. Connect Shopify to QuickBooks
With your QuickBooks account ready, head to the QuickBooks App Store or Shopify App Store. Pick the integration tool you chose (Shopify Connector by Intuit or A2X). Follow these steps to connect:
- Sign in to your Shopify account and allow QuickBooks access.
- Sign in to your QuickBooks account and grant Shopify access.
- Choose the sync style you prefer (order-level or summary-by-payout).
- Select payment gateways (Shopify Payments, PayPal, etc.) for proper mapping.
- Configure currency settings if you need to (especially for multi-currency stores).
3. Map Accounts and Taxes
Next, map your Shopify data to the right QuickBooks accounts. This step makes sure your sales, fees, taxes, and other data route correctly.
Example: Map sales to your Income account, taxes to the Sales Tax Liability account, and fees to an Expense account like “Shopify Fees.” You also need to map gift cards to a Liability account. Be careful about Shopify tax exemptions and how to set them up.
4. Choose Your Sync Style
Now decide how detailed you want your data in QuickBooks.
- Order-level (Intuit Connector): This sends every order to QuickBooks. You get full details of each transaction. It’s great if you need detailed tracking of sales, refunds, and discounts.
- Summary-by-payout (A2X): This sends one summarized entry per payout. It includes everything in one clean entry. It’s perfect for quick, easy reconciliation without all the noise.
5. Run Your First Sync
With everything set up, run your first sync. Start with a short date range—7–14 days works best. This lets you double-check that everything syncs correctly. Once you’re happy with the results, check QuickBooks. Make sure the totals match your Shopify payouts.
6. Enable Auto-Sync and Test
Once you confirm everything syncs properly, turn on auto-sync. You can choose how often it syncs (daily or weekly) based on what you like. This keeps your Shopify data flowing automatically without any manual updates. See how to automate your Shopify accounting.
Pro Tip: Reconcile weekly or bi-weekly to catch issues early, instead of waiting until month-end.
That’s it! Your Shopify store now connects to QuickBooks, and your accounting syncs automatically.
How Do You Map Shopify Data to QuickBooks: Chart of Accounts Mapping
A well-set Chart of Accounts (COA) makes sure Shopify data goes to the right places in QuickBooks. This helps keep your books organized and accurate, especially when tracking profits, taxes, and fees.
- Set up your Chart of Accounts (COA): Create accounts for Sales, Shipping Income, Fees, and Taxes in QuickBooks. This makes sure Shopify data lands in the right accounts.
- Link Shopify data to QuickBooks accounts: Connect Sales to your Income account, Shipping Fees to Shipping Income, Shopify Fees to an Expense account, and Taxes to the Sales Tax Payable account.
- Use the default COA or customize it: QuickBooks gives you a default COA for Shopify, but you can change it if you need to track things like product categories or extra expenses.
- Double-check your mappings: Make sure everything is mapped correctly to avoid issues with reconciliation. This keeps your books accurate and saves time.
How Do You Reconcile Shopify Payouts in QuickBooks?
Once you connect Shopify to QuickBooks, reconcile your payouts next. This matches Shopify deposits to your bank deposits. It keeps your books balanced and accurate. Here’s how:
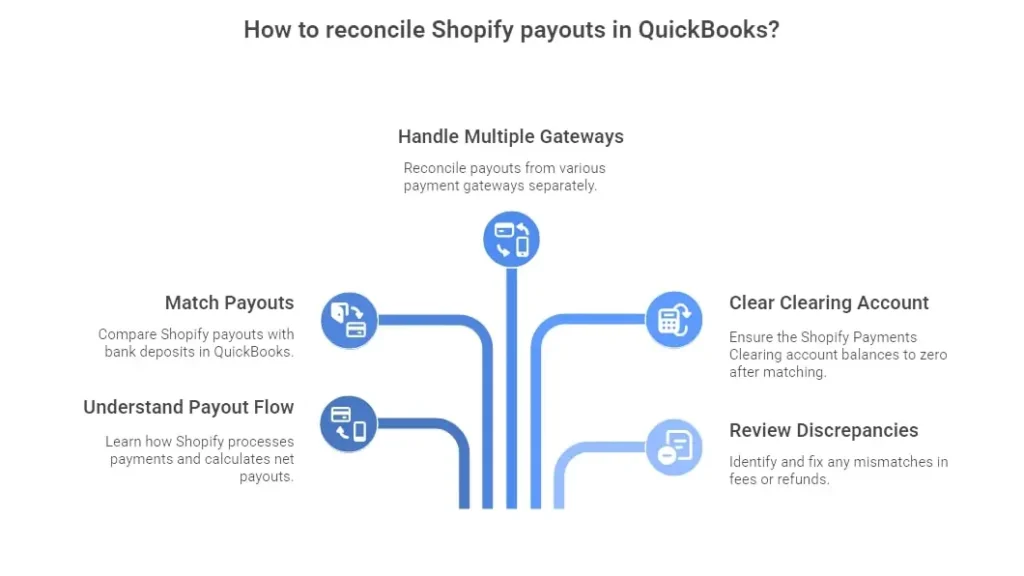
1. Understand the Shopify Payout Flow
Shopify Payments handles payments. It takes out fees, taxes, and refunds first. Then it sends you the net amount. Match this net payout to your bank deposit. Here’s the payout process:
- Shopify gets customer payments (total sales).
- Shopify subtracts fees, taxes, and refunds, such as sales taxes and use taxes for Shopify sellers.
- The leftover net payout goes to your bank.
2. Go to the Reconcile Screen in QuickBooks
Open the Reconcile tab in QuickBooks. Pick your bank account. QuickBooks shows the Shopify payout entry. It should match your bank deposit.
3. Match the Payout to the Bank Deposit
Compare the Shopify net payout (like $5,415) to the bank deposit in QuickBooks. If they match, click Match. If not, look for problems like missing fees or refunds.
4. Handle Multiple Gateways (PayPal, Klarna, etc.)
If you use other options like PayPal, Klarna, or Shop Pay, reconcile them one by one. Set up a separate clearing account for each in QuickBooks. Match each payout summary from Shopify to its clearing account.
5. Clear the Shopify Payments Clearing Account
After matches, clear the Shopify Payments Clearing account. It holds funds short-term until they hit your bank. Once matched, its balance drops to zero.
6. Review and Fix Discrepancies
When you see mismatches (like wrong fees or refunds) fix them this way:
- Check fee mappings.
- Confirm refunds and chargebacks show up correctly.
- Verify all payouts categorize correctly in QuickBooks. After fixes, the clearing account balances to zero. Keep your Shopify books accurate with the SAL Shopify accountant.
Case Study: Fixing Payout Mismatches for a Bakery1
A Toronto Shopify store contacts SAL Accounting:
Problem: Bella’s Bakery had $12,000 in monthly sales. PayPal and Shopify Payments payouts didn’t match QuickBooks. Refunds and fees caused errors.
What We Do: We set up separate clearing accounts for each payment gateway, check tax mappings for Canada GST/HST, and reconcile weekly.
Result: Payouts match QuickBooks automatically. Month-end reconciliation drops from 5 hours to 30 minutes. Errors disappear.
- Read More: “How to Track COGS for Shopify”
Shopify QuickBooks Sync Problems and How to Fix Them
Sometimes Shopify and QuickBooks don’t sync perfectly. Shopify and other e-commerce accounting mistakes can become pricey. Here are common problems and simple ways to fix them.
1. Shopify Payouts Don’t Match Bank Deposits
Your Shopify payout might not match your bank deposit because:
- Timing: Payout and deposit dates don’t line up.
- Missing Fees or Refunds: Shopify fees or refunds don’t show in QuickBooks.
- Currency Issues: International sales may use the wrong currency.
How to Fix: Compare the correct dates. Add any missing fees or refunds manually. Make sure Shopify and QuickBooks use the same currency.
2. Shopify Fees Go to the Wrong Place
Shopify fees, like transaction fees, may end up in the wrong QuickBooks account.
How to Fix: Open QuickBooks Chart of Accounts and map Shopify fees to the right Expense account. Adjust mapping if needed.
3. Sales Tax Doesn’t Sync Right
Sales tax may not move correctly from Shopify to QuickBooks.
How to Fix: Check tax settings in Shopify and QuickBooks. US sellers should enable Automated Sales Tax (AST). Canadian sellers should set up GST/HST correctly. Have a look at what the sales tax nexus is and how it works for e-commerce.
4. Inventory Doesn’t Update
Shopify inventory may not sync with QuickBooks, causing wrong reports.
How to Fix: Turn on inventory tracking in QuickBooks. If you use A2X, check its sync settings. Compare inventory in Shopify (Managing Inventory) and QuickBooks regularly. Also, gain more about Shopify inventory accounting.
5. Missing Sales or Transactions
Some sales might not appear in QuickBooks after syncing.
How to Fix: Check Shopify and QuickBooks transaction logs. Add missing sales manually or re-sync accounts. Make sure all payment gateways are set up properly.
6. Multiple Payment Gateways Make Reconciliation Hard
Using PayPal, Klarna, or other gateways can make reconciliation tricky.
How to Fix: Create separate clearing accounts in QuickBooks for each gateway. Match payouts from each processor to the correct account.
7. Multiple Shopify Stores or Channels Get Confusing
Selling from multiple stores or platforms can get messy.
How to Fix: Use QuickBooks Classes and Locations to separate sales by store or channel. This keeps reconciliation simple and helps track each store’s performance. Manage Shopify payouts easily with our bookkeeping services for e-commerce.
The table below shows common Shopify–QuickBooks sync issues and how to fix them quickly:
| Problem | Cause | Fix | Best For |
| Payouts don’t match | Remap in the Chart of Accounts | Match dates, add fees, check currency | Accurate bank deposits |
| Timing or fees are missing | Bad mapping | Remap in Chart of Accounts | Clear expense tracking |
| Sales tax off | Wrong tax setup | Enable AST or set GST/HST | US & Canada sellers |
| Inventory not syncing | Tracking off | Turn on tracking, check A2X | Stores with stock items |
| Missing sales | Sync failed | Re-sync or add manually | Complete reports |
| Multiple gateways | Mixed payouts | Separate clearing accounts | Multi-gateway stores |
| Multiple stores | Mixed data | Use Classes/Locations | Multi-store sellers |
Case Study: Fixing GST/HST for a Nonprofit2
A Toronto Shopify store contacts SAL Accounting:
Problem: The store sold $30,000 in fundraising gear. They overcharged $3,900 in HST because the nonprofit’s CRA tax number wasn’t set correctly. Donors complained. Audit risk was high.
What We Do: We verify the GST/HST number with CRA, tag “Zero-Tax-CA” in Shopify, set a “No-Tax Items” collection, and refund $3,900.
Result: The nonprofit avoids $3,900 in HST. Donors are happy. The store avoids audits and tax exemptions work automatically.
Final Thoughts
The Shopify–QuickBooks integration is more than a way to move numbers. It saves time, prevents errors, and protects your profits. With the right setup, accurate tax mapping, and regular payout checks, your books stay clean, reports remain accurate, and month-end closes become stress-free. This guide shows the exact steps to make it work in 2025.
SAL Accounting can handle your Shopify–QuickBooks integration, simplify your accounting, and ensure you never miss a payout or tax. Contact us today for a free consultation.
FAQ: Quick Answers on Shopify and QuickBooks Integration
Install A2X or Synder from the Shopify App Store. Connect your QuickBooks account, map sales data, and sync in 15 minutes.
QuickBooks Online Plus fits best. It handles multi-channel sales, inventory, and taxes for growing DTC stores.
No, but A2X simplifies payout matching. Alternatives like Synder work too, especially for multi-platform stores.
Yes, apps like A2X sync GST/HST or sales tax to QuickBooks. Set tax rules in Shopify for auto-tracking.
Sales, fees, refunds, taxes, and payouts sync. Apps like A2X map orders to invoices or journal entries.
Yes, QuickBooks tracks refunds and Shopify fees. A2X or Synder auto-categorizes them for clean books.
Absolutely. It syncs GST/HST for Canada and sales tax for the US, keeping compliance easy for both.